Tuesday, December 03, 2013

Custom SharePoint 2013 App Development for You

SharePoint 2013 represents a major shift in how Microsoft recommends businesses create and deploy the custom ‘glue’ that connects all your SharePoint data, and by extension your business processes. In the past custom Web Parts could be created and deployed to SharePoint using the traditional .NET environment on the server. Today and in the future, however, Apps are the way to go because they do not impact the server nearly as much, which means your SharePoint sites will be more stable, scalable and secure as they do less custom work.

To further encourage the use of Apps, Microsoft has made huge investments into management for SharePoint administrators as well with the new App Catalog. From users requesting Apps to administrators deploying apps to stakeholders purchasing or licensing Apps, Microsoft introduces a true usage lifecycle for each custom piece your business needs.

Finally, SharePoint 2013 Apps can be built with rock solid, proven web technologies like HTML and Javascript so that they can run on PCs, Macs, iOS and Android devices—anything with a modern browser—and support not just keyboard and mouse but touch as well.

We think this is exactly the right direction for Microsoft to take SharePoint custom development as we’ve been using this architecture (running as much as possible on the client) since SharePoint 2007. One reason so many people have appreciated our IntelliGantt Web Part is that it actually wasn’t much of a Web Part at all. Rather, it was a package that downloaded to the client PC, communicated with the SharePoint server but did all the work locally. Basically, we vetted the new SharePoint 2013 App approach for Microsoft and proved it works for custom development years ago.

Of course we’ve done IntelliGantt for SharePoint 2013 using the new App model, which is really second nature for us. We’ve heard is the marketplace could use our expertise with the SharePoint 2013 App model to migrate custom web parts to this new environment, something we are more than happy to do.

If you have a current web part or idea you would like to turn into a SharePoint 2013 App and:

  • Run outside of your production SharePoint Servers (stability and scalability)
  • Manage deployment and usage (security)
  • Access from any modern HTML device (ubiquity)
  • Have a friendly UI for keyboard, mouse and touch (usability)

We can make it happen. We’ve been doing it for years with our industry leading products, and now we can make the same skills available for you. Contact us at TeamDirection by email or phone let's get to work.

Tuesday, November 19, 2013

IntelliGantt + IntelliTask + Google Sites = Revision 2

We received feedback from Google Site users that the IntelliGantt + IntelliTask combination wasn't as easy as it needed to be. So we took these findings to heart and made the interaction among our products and Google Sites even better. The cool thing is we were able to do this without changing the actual IntelliTask Gadget itself, just the underlying HTML the Gadget points to. This means if you've already installed the IntelliTask Gadget, you just need to refresh your web page to see the enhancements in your Google Site. Here's what it will look like:

The big changes here are twofold. First, we do the initial housekeeping for you: we now create your initial IntelliGantt Workspace and Project for you. This makes it easy when you visit IntelliGantt for Google to plan and schedule your project. Second, we put in a breadcrumb showing you the current workspace (which is the Google Site) and the current projects within the Google Site. You can see this if you click on the tab controls for 'Workspaces' and 'Projects'. These tabs help you identify the workspace and project we created. This makes it easy to find and then modify projects for this Google Site within our IntelliGantt for Google application. Though this example is simple, you will see the Google Site as a workspace when you start IntelliGantt for Google:

Click on the 'forward' arrow to go to the application where you can click on the Google Site's projects. Again, this is a simple example so you are just showing the single project created for you automatically, but you can have as many projects within a Google Site as you like.

Since this project was created by default when we went to the Google Site, it doesn't have any tasks in it. Here we will add a few tasks and assign one to 'John'.

Remember that the IntelliTask control is designed to show all the tasks assigned to the current user. That is, the active Google+ user. Since that happens to be 'John' here, when we go back to the Google Site and refresh the page, we see all of his tasks.

This makes it very easy to create a Google Site, drop in an IntelliTask Gadget, create an actual project with IntelliGantt and have everyone see their assignments in IntelliTask within the context of their Google Site.

Monday, November 18, 2013

Working with SharePoint 2013 Tasks

To work with tasks, you will first need to select a starting point. In this example we have selected task 'Four'. Note that because 'Four' has children, we see the expand/collapse triangle on the left of the row. Click on the '+' to bring up the add options.

Click the 'Add Child' icon shown as an indented arrow multiple times to add a series of new tasks. By default they will be named 'New Task' of zero duration with a due date of today.

You can edit the display name of each task by left-clicking or index-finger-touching in the 'Display Name' cell.

Any change you make in IntelliGantt for SharePoint will be immediately updated in the task list. If you ever make a change by mistake, simply click the undo button.

Now that we have renamed each of the tasks, we can schedule by either dragging and dropping in the gantt chart or by editing the Start and/or Finish fields in the task grid. Cell editing is just like how we changed the 'Display Name'. Just mouse-click or finger-touch in the cell you want to edit and we will bring up the date/time control.

Here, though, we will focus on drag and drop operations. You can move the mouse over the task's point in time on the Gantt chart and receive immediate feedback. When the mouse is over the end point you will see it turn grey. We don't show this feedback with the touch interface as your finger will be on the task.

Turn the 'milestone' task into one with a duration by holding down the SHIFT key and moving the finish date forward in time.

Reschedule the task by moving it left or right along the timeline. Finally, if you want to turn it back into a milestone, select the start date.

Move the start date towards the finish date. When the two meet it becomes a milestone again. You can then move it forward in time to reschedule as a milestone.

So the rule is, to give a task a duration you change both the Start and Finish times. With the mouse you do this by starting the drag operation as you hold down the SHIFT key. This will fix the Start date to the current value and you'll now be dragging the Finish date. This operation is tough to do with just the finger so we recommend giving tasks durations by changing their Finish values in the task grid by clicking in the Finish cell.

Finally, to indent or outdent a task, simply click on the task icon in the task grid and drag it to the right to indent, or to the left to outdent. Watch for the cursor to change when you move the mouse over the icon. For touch screens, just put your finger over the task icon and move left or right.

Note that the cursor change shows the 'four-sided' left+right+up+down arrows. So yes, you can reorder tasks by dragging up and down as well. And remember you have that undo operation available.

Friday, November 15, 2013

Getting Started with IntelliGantt for SharePoint 2013

We published the 'how to install' post the other day and now we will be posting a series on the basic features of IntelliGantt for SharePoint 2013. Yes, we were so excited about colors that we did sneak another post in, but this is the official 'Getting Started' information.

First, a word about why we are not in the Microsoft SharePoint Marketplace store yet. We're actually all ready to go with the SharePoint Store licensing and everything except for one requirement-- apps must run on IE9. This is a problem because while IntelliGantt for SharePoint is very HTML5 compliant, IE9 is not. We run just fine on IE10 and IE11, the latest few iterations of Chrome, Firefox and Safari, but if you're running IE9, well, please upgrade.

Now let's get started.

After installing IntelliGantt for SharePoint in your App Catalog and placing an instance in your site, let's look at the first couple things most people will want to do. Most sites have a default Task List as part of their template, but some don't. We will start off with a site that does have a 'Tasks' list, but we will show you how to add another task list just in case.

IntelliGantt for SharePoint can handle as many task lists as you like in your site, which makes it very useful for aggregating things into a single display to work with. To add a second task list to this site we click on the '+' sign next to PROJECTS. This brings up a form that lets us name the new Task List we will be creating.

Once created we will see the second task list appear in our PROJECTS selection control. This is a standard HTML5 multi-selection control you can use to select either a single task list by clicking or touching, or multiple task lists by mouse+ctrl or more touching. When you select a project, it highlights in the PROJECTS control and appears in the task grid/gantt chart.

Since we just added this task list there aren't many tasks in it. In fact, there's exactly zero. So let's add a few. Click on the vertical '+' icon to the left of the task grid. This means we will be adding things to the currently selected row. By default the task icon will also be selected, but if you play around with the tool and use the other add options, you may need to reselect the task icon so that the 'down' and 'indent' arrows appear. These arrows tell IntelliGantt for SharePoint how to add new tasks. The 'Down' arrow means add a task below the current selection as a sibling to the current selection. The 'Indent' arrow means add a task as a child of the current selection.

Click the 'Indent' arrow four times and we will add four child tasks like so:

Click on the display name of the task in order to invoke in-place editing. Type in a better name, like 'Renamed'. The only cell that doesn't support in-place editing is the column under the first 'Expand' header. Every other column supports an in-place editor for that field type-- text, dates, choices, flags, currencies and percentages.

We're starting to create our first project by adding a few tasks and renaming them. You can continue adding more tasks, but you'll also want to know how you can quickly find things again. Simply type in the display name (or any other attribute value) of the task you'd like to find into the 'type to find' text box. This does an instant search by keystroke on the client so you never have to bug SharePoint to find things again.

Try building a more complex project and also check back with the underlying SharePoint Task Lists to see your data there as well-- safe and secure. We will be posting more 'helper' posts in the days to come. You'll also be able to find help on our IntelliGantt for SharePoint help page or ask a question in our forum.

Thursday, November 14, 2013

Changing the Display Order of SharePoint Task Lists

IntelliGantt for SharePoint 2013 lets you pick the order in which the task lists and their corresponding task items present themselves. To start off with, the task lists in the PROJECTS selection control are sorted alphabetically.

From here, the order in which I pick each task list in the PROJECTS selection control will determine where it's placed in the Task Grid/Gantt Chart control. The method is quite simple, each selection is added to the existing list. So if I pick 'Second Task List', then 'Third Task List' and finally 'Tasks', the order will be like so:

If you don't like that order, simply unselect the task lists from the PROJECTS selection control and start over. Here we will do 'Tasks', 'Second Task List' and 'Third Task List':

The PROJECTS selection control is of course a normal HTML selection list, which means you can hold the Control key down to make multiple selections or removals. Better yet, if you have many task lists you'd like to see at once, you can select the first one, hold down the SHIFT key and select the bottom task list so that the entire range is selected. This will put everything into the Task Grid/Gantt Chart control. It'll make adding 20 or more task lists at a time rather quick.

Wednesday, November 13, 2013

Task Colors in SharePoint 2013

January 2015 Update for SharePoint 2013

One of our more popular features is the ability to change the colors of tasks in SharePoint task lists. Our IntelliGantt for SharePoint App carries this feature forward and adds the extra ability to apply the color to all of a tasks children as well. This is a little different than setting the color for a choice value, which is coming shortly. Rather, this is saying 'forget all algorithms, just make this task pink!', or something to that effect. We hear this is a great feature for presentations where you simply want to highlight a block of tasks with a particular color. Here's how it works.

Let's say we start with a simple task list and we want to make 'One' purple.

IntelliGantt for SharePoint recognizes columns names and, if they match a particular name, will allow new features. Color and ColorChildren are such examples. To enable the color changing feature, we must modify the list columns for our task list. First go to the actual SharePoint Task List and choose the 'List Settings' ribbon icon.

Make sure you have elevated permissions as next we need to create two columns. One for storing the color and the other for storing a flag if we apply this color to children.

We need to add a 'Single line of text' column named 'Color'. This will be the columns that contains a hex-code value of the color we choose for this task.

By default SharePoint will add this column to your current view, but since they're not really user-friendly, we recommend that this column is not displayed. The other column we are going to create builds off the 'Color' column we just added. In this case it will be a Yes/No column type named 'ColorChildren'.

Similar to the 'Color' column, it is not necessary to add the 'ColorChildren' column to your current view.

Now how do we use this newfound color feature in IntelliGantt for SharePoint? First let's go to the IntelliGantt for SharePoint App instance within the same site as the Task List we just modified.

We have task 'One' selected, so click the '+' button and the four colored squares buttons to add the color. They are both underlined in this picture. You'll see these same underlines in the App as well.

This control lets you click anywhere on the color chart, type in a specific hex color value and change the color's luminosity. The checkbox below the color chart lets you apply this color choice to all children of this task as well. This makes it easy to color blocks of tasks. In this example we wanted to make the task purple.

Clicking on the green checkmark in the upper right of the color chooser accepts the change. Clicking on the 'X' will reject it and undo any color changes you've made. In this case we have accepted and our Gantt Chart shows the purple color for the task.

If you're curious what values are actually stored in SharePoint, here's what our choices look like.

Because we are using the SharePoint Task List to store the associated color information, its open to other processes changing the color as well. For instance, you might kick off a workflow that highlights all extremely important tasks in chartreuse. We will also show in the coming weeks how you can tie color choices to Choice Columns as well.

Wednesday, November 06, 2013

Install IntelliGantt for SharePoint into the SharePoint 2013 App Catalog

January 2015 Update: Our latest solution works for both SharePoint Online and Inhouse. Desktop, laptop, tablet, phablet and mobile. IE, Chrome, Safari and Firefox. Install it today.

Installing a web part in SharePoint 2007 was difficult. Installing a web part into the SharePoint 2010 Sandbox was better. Installing an App into the SharePoint 2013 App Catalog is actually a pleasant experience. Like SharePoint 2010 Sandbox solutions, you can upload a SharePoint 2013 App as a single file and make it available to users. What improves in SharePoint 2013 is both the administration tooling and the support for web standards like HTML5, Javascript and REST. As a result, SharePoint 2013 Apps can be incredibly powerful, run on anything that supports the web and still be easy to deploy. Let's take a look at this winning formula with IntelliGantt for SharePoint.

We will be working with SharePoint on Office 365 for this example, but the steps are the same if you're running SharePoint 2013 in house as well. The first thing is, given a SharePoint 2013 site (one that's been migrated from SharePoint 2010 at that!), click on the Admin->SharePoint menu to start the deployment steps.

In the SharePoint admin center, click on the 'apps' on the left hand side to enter the managed apps tool.

We're in the apps section, but another step here as we need to get into the App Catalog. Click here next.

OK, we've made it to The App Catalog, but we still have a couple clicks left. Nothing too arduous though, just following another link.

We are in the right spot. Now it's time to actually to do something. Still pretty easy, though. We have to drag and drop the IntelliGanttApp.app file onto the Apps for SharePoint page. This will upload the file into the right spot and SharePoint 2013 will recognize it as a new App.

Once added a few statistics about IntelliGantt for SharePoint pop up. We will add a couple more bits of meta-data so that IntelliGantt for SharePoint presents well to people adding it to their sites.

Each App for SharePoint 2013 has meta-data available you can fill out. Here I've filled out a bit of description and the all-important Icon. We have one available for you here.

And that's it for deploying a new SharePoint 2013 App. Yes, there are too many clicks, but hopefully we've shown you where to go and once you arrive the task at hand is simply dragging and dropping a file. So now we need a SharePoint site to try out the IntelliGantt for SharePoint App. Let's create a new Project Site.

Inside the new Project Site, which we've named 'IntelliGantt Project', click on the 'Add lists, libraries, and other apps.' IntelliGantt for SharePoint will be that 'other app'.

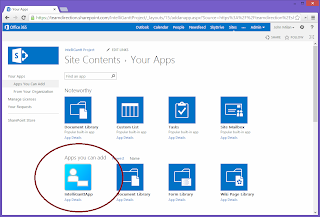
Since we added IntelliGantt for SharePoint to the App Catalog, it now is available as one of 'Your Apps' you can add to a site. Note the pretty picture for IntelliGanttApp. That was from the link we put in. Hmm... I probably could have been more descriptive on the title! Go ahead and click this to install it to this site.

SharePoint will ask you if you trust IntelliGanttApp. We certainly think so!

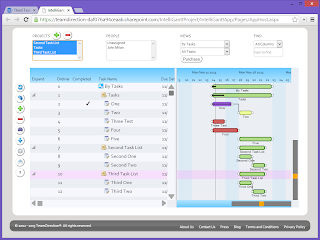
Voila! Here is the first time we actually see IntelliGantt for SharePoint running. Lots of features to go over in future blog posts, but did you notice that it already sees the Tasks list in this site? Also, it pulled in the users (just John right now) and also put in an 'Unassigned' person for you. I bet this will be helpful when finding unassigned tasks! Finally, notice that the VIEWS seem to have some data as well. Without having to lift a finger (which is probably a bit tired from all that clicking), IntelliGantt for SharePoint found the relevant data in your project site.

Let's just add a few tasks and see how things look. I click the '+' icon on the left and a mini tool-palette appears. I can add siblings or children below the current selection. Since we are at a top level list, let's add children.

We need a better task name then 'New Task' for everything, so let's make use of IntelliGantt for SharePoint's rich in-place editing to update all the names just as you would in a good old-fashioned client application.

We will have many more posts showing all the new features of IntelliGantt or SharePoint, but one thing I want to leave you with is, just like the old IntelliGantt Web Part for SharePoint, IntelliGantt is actively connected to your task lists so that your changes are immediate. IntelliGantt for SharePoint keeps all its data as your data-- in the SharePoint task list. Safe, secure and backup-able.

Ideally after seeing how simple IntelliGantt for SharePoint is to install and start running you will want to try it out for yourself. Please Do! We think the functionality is well thought out and straightforward. You can download it today and see what you think.