Showing posts with label Google. Show all posts

Thursday, October 24, 2013

Adding Fields to your Projects

We just pushed out a new feature for our online gantt software that lets you create new fields in your projects. Right now we support text fields, numbers (including currency and percentages), dates, flags and choices. The new fields you create are available for every project and for every user you are collaborating with. You can also display these new columns within the gantt chart, search for values within these columns, print them and even download all the data. In short, we've made IntelliGantt extremely customizable for your project needs. Hopefully we've made it simple to use as well. Here's how it works.

Here is a basic project we've been using in our demos with the standard field layout.

If you move the mouse into any column header or select a column by tapping on it with your finger, you will see the 'cog' and '+' images appear.

The cog lets you configure the existing column. The + lets you create a new column. In this case we will click the +.

Notice that the task list grid now shows a 'New Column' header where we clicked the + sign. Also, a new window appears that lets you configure the new column. This is actually what you see if you had just clicked on the cog. When you clicked on the + it created the new column first and then brought up its editor. With this you can configure the 'Column Name' and the 'Display Name'. These are different because we anticipate you may wish to work with the data later and 'Column Name' can be something machines can use to reference data while 'Display Name' is more human friendly. Let's change both to be 'Extra'.

With the new Extra field we can enter values with in-place editing just like any other field. These values are now part of the project and visible/editable by any other IntelliGantt user.

You can go back to the field configuration at any time by clicking on the cog again. These custom fields are extremely flexible. You can change not only the column name and display name but also what type of data they display as well.

For example, another very useful type of field is 'Selection'. This lets you create a selectable list of values for IntelliGantt users, reducs the chance of data entry errors and thereby improve the 'Smart Search' results. You could always create another column with the field type you want, but here we will simply change it to 'Selection' and type in our values. We enter a 'blank' first line so that users have the option to blank out a cell.

Now instead of a text edit field we get a dropdown from which users can select the values we entered. Since we marked the field type as 'Selection', we can only select a single value. If we had chosen the 'Selections' field type, then the in-place editor would change to support multiple selections.

If you are an IntelliGantt for Basecamp user, then other IntelliGantt for Basecamp users will see the columns you create and you will see the columns your colleagues create. Team members just using Basecamp, however, will not see these new fields. Therefore this lets project managers track additional information important to the project but superfluous to others.

If you are an IntelliGantt for Google user, then other IntelliGantt for Google users will also see the columns you create and you will see the columns your colleagues create. Team members who use the IntelliGantt Task List will not automatically see them. You can control which fields are visible and editable for team members. As this picture shows, the IntelliGantt for Google configuration window has extra checkbox fields for these options.

Wednesday, September 18, 2013

Adding Colors to Tasks and their Children

For all the folks who have been asking about how to change the colors of tasks in IntelliGantt, and there have been many of you, I have good news-- you can now change the color of any task in IntelliGantt! We also went a step further and added a toggle so that if you want that color to apply to all the sub tasks as well you just click a checkbox. Finally, if a sub task inherits a color from a parent task but you really want it to be purple, you can do that too. Let's take a look.

Here's a project within IntelliGantt for Basecamp using the default colors-- green for tasks that are completed or are ahead of the timeline and red for tasks that are not completed and behind the timeline. To change the color of a task first select it (in this case we have selected the task 'Fifth List') and click the '+' button on the left-side.

This brings up our new and improved palette of add options. This picture shows what it will look like the first time you click the '+'-- it will have the 'Add Task' option pre-selected for you. Hopefully it makes sense that to change colors you click on the four 'colors' image. A little underline under each image also tells you what is active at the moment.

Once the task and the color palette have been selected a color chooser pops up. By default it will be FFFFFF, which we are treating as 'use the default color'. You can change this by clicking anywhere on the color map. You can also change the luminosity with the vertical slider just to the right of the color map. As you make changes you will see the new hexcode in the edit box and the chosen color applied to the task.

If you would like to apply the same spiffy color to all of the select tasks sub tasks, we have the 'Give children the same color' checkbox for you. This can be overridden at the child task level by directly setting its color. If the child is just using the default color, then it inherits the parents color.

And that's it. Simply click the checkmark button to accept the changes or the X button to cancel and revert to the previous color scheme.

Once you accept or cancel the changes you go back to the palette options. You can either exit this palette by clicking the X at the top (highlighted in red) or choose another palette tool to work with. In this case, since the post is about colors, we will select the color palette and reset things back to the default scheme.
To reset the color scheme of the selected task back to the defaults, simply click the 'Reset' button. Or you can type FFFFFF back into the hexcode edit box.

Accept changes when you're ready, or if you change your mind later you can always click 'Undo'.

The color chooser feature is available in IntelliGantt for Basecamp, IntelliGantt for Google and IntelliGantt for Everyone. Coming soon, fun with columns!

Monday, July 08, 2013

Adding Hyperlinks to Tasks

New features are continuing to roll out for IntelliGantt for Basecamp, IntelliGantt for Google and IntelliGantt for Facebook. You'll see a steady stream of new column types that become available over the next few months, but first we have not a column type but a bit of metadata-- associating web hyperlinks with tasks. With this feature you can frame the context of your task with links to SharePoint documents, YouTube videos or PDF files on your internal network.

First select the task you wish to add the hyperlink to. Here we will select 'Change 2'.

Click the '+' button since we will be adding a hyperlink. What will popup is our 'super add' dialog that lets you add both new tasks and hyperlinks using the current selection as a point of reference. Note that 'Change 2' is bounded above and below. The 'Add Task Above' boundary lets you add a sibling task or a child of a sibling task above, depending if you click the left or right '+' button. The 'Add Task Below' boundary lets you add a sibling task or a child task below, depending if you click the left or right '+'.

But we are focusing on hyperlinks in this post. For that please note the 'Add Web Link' area consisting of two text boxes, two buttons ('+' and '-') and a dropdown select box. This is a multi-function control that lets you add hyperlinks by typing in the title and the link (or more likely pasting the link) and then either hitting the 'enter' key or clicking the '+' button. When this happens the title/link pairing is added to the list of hyperlinks for the selected task.

You can immediately view the hyperlink you just added in the dropdown .

You can use this dropdown to select any of the hyperlinks associated with a task. If you don't like one, simply remove it by clicking the '-' button. When you dismiss the add dialog you will now see a paperclip next to the task in the task list. When you see this paperclip it means the task has one or more hyperlinks associated with it.

To see all the hyperlinks associated with a task, simply click on the paperclip or, if using a tablet, touch the paperclip with your finger. A dialog appears listing all the hyperlinks for the task.

Each hyperlink has the actual link, the title supplied when creating the hyperlink and, if you're running the IntelliGantt project manager tool (as seen in these screenshots) the ability to remove the link by clicking the '-'. You'll most likely click the 'link', though, and see a new tab open up with the url.

Wednesday, May 22, 2013

IntelliGantt Task Gadget for GMail

We love to integrate with existing platforms here at TeamDirection. Ever since we starting connecting with Google's amazing variety of services, we've been quite busy. Except for one thing-- Google Tasks, as they presently work, are absolutely useless for a group. A project manager simply cannot post a task to someone else's google task list. Thankfully, we did find another way.

TeamDirection is introducing its own GMail task list gadget that is cross device, cross browser and most importantly cross user.

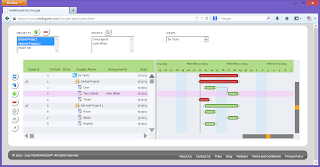
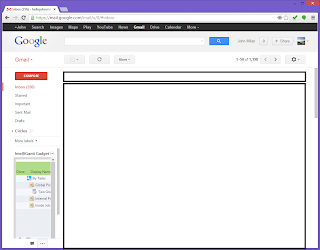
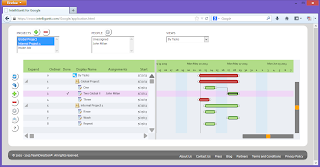
Let's start with IntelliGantt for Google. This is what the project manager will use to create and schedule GMail (and Google Site!) aware projects. Here we are showing a couple projects with three tasks each, one of which is assigned to John.

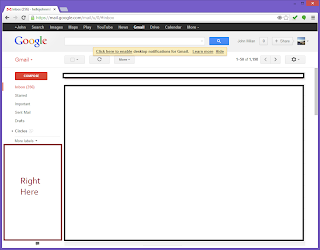
What we would like to do is put in a 'John aware' task list in the empty area to the lower left marked 'Right Here'.

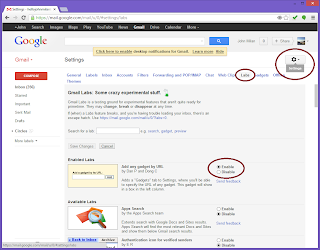
Thankfully GMail provides a way to do just this in its Settings. Go into Settings, select the 'Labs' tab and enable the 'Add any gadget by URL' option.

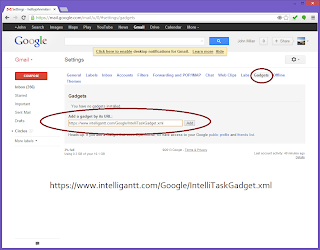
This will create a new tab option your Settings screen labeled 'Gadgets'. Select the 'Gadgets' tab and add a gadget by its url using: https://www.intelligantt.com/Google/IntelliTaskGadget.xml

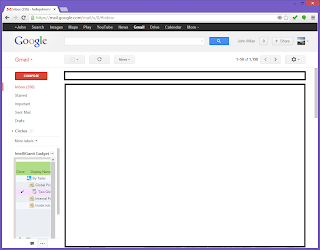
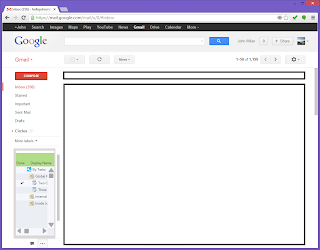
When you return to the main GMail window you will now see an IntelliGantt task list in the heretofore empty lower left of the window. Space is a little tight, but IntelliGantt recognizes the logged in user and provides a list of their tasks.

When you finish a task, you can simply mouse click or finger touch in the 'Done' cell.

This marks it as completed in the original project as well so the project manager can see the work getting done.

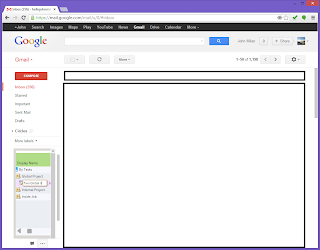
Users can also make edits to tasks right in place. For example, to change a task's name, mouse click or touch the Display Name cell. This brings up an in-place text editor.

These changes, naturally, also go right back into the project for the manager to see.

There's always more work to do, though. Since John finished his task (and changed its name), the project manager assigns John to another task.

Which John will see right in his GMail window.

We are making the IntelliGantt Task List for GMail freely available. Simply follow the installation steps above and you're off and running. Project managers will need IntelliGantt for Google to create and manage the projects.

Tuesday, May 21, 2013

IntelliGantt for Google Sites Gadget

A quick post to let you know we created an IntelliGantt Gadget to make it even easier to place within your Google Sites.

Rather than add an iframe control and configure it, we created a gadget that you just supply the URL to. The URL is:

https://www.intelligantt.com/Google/IntelliGanttGadget.xml

You still will want to resize thins properly so it fits in your page, but this is a bit easier for placement in Google Sites, or any other spot that accepts gadgets.

Monday, May 20, 2013

IntelliGantt Integration with Google Sites

Perhaps Google Sites were in response to Microsoft SharePoint, which we work with quite a bit. However, now that IntelliGantt for Google is here we've been looking at different ways we can integrate with with Google's myriad platforms. One of the most powerful integration stories is with Google Sites. Why? Well, similar to SharePoint, it:

  • Provides an encapsulation of a work effort-- like a project.
  • Ties in with your Google+ account circles for user lists-- like a resource pool.
  • Starts out private but let's you share with specific people.
  • Is available 24/7.

  • Is free.

So we put our heads together and noticed that with a site and a gadget we can encapsulate IntelliGantt so that only the projects created in the site are visible within IntelliGantt. When you move outside the Google Site, then all your projects are visible. This is a powerful way to provide both context and appropriate visibility to your projects and team members. Let's see how it works.

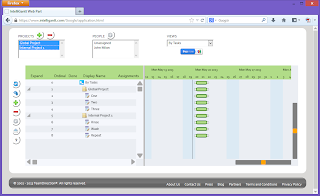
First we will open IntelliGantt for Google and see if we have any projects globally. It turns out we do-- our Global Project.

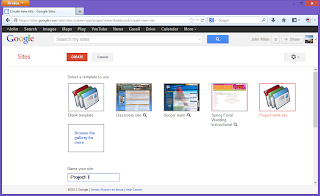
Now let's go to Google Sites and create a new Site. You can use any site template within Google's library. Because we focus on project management, we chose the 'Project work site' template for this example, but it could just have easily been 'Spring Floral Wedding Instructionala'. The steps for adding IntelliGantt for Google will be the same.

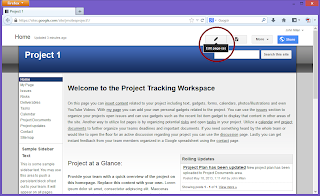
Now that we have our new Google Site let's edit it so we can insert IntelliGantt for Google and place it on the page. First, we need to start editing the site. Click the pencil to put things in edit mode.

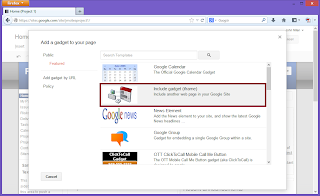
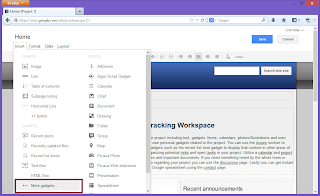
Place the cursor on the page where you want to insert and then click the 'Insert' tab. Choose the last entry called '... More Gadgets'.

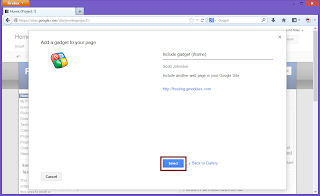
Choose the 'Include Gadget (iframe)' gadget.

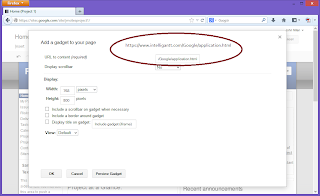
Now for the trickiest part of the whole process. Really it's just putting the correct url into the 'URL to content (required)' field. It needs to be:

https://www.intelligantt.com/Google/application.html

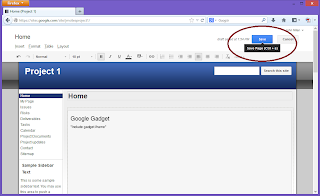
You can play around with the other settings until you find a combination you prefer. After you have completed that Gadget settings page, save and back on the main Google Site save again.

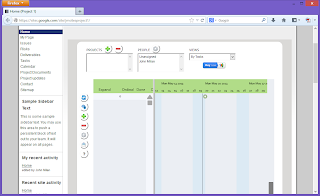
After you have saved the page, Google Sites will fully render the new page and you will see IntelliGantt for Google right where you inserted it.

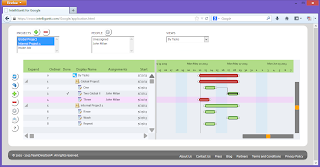
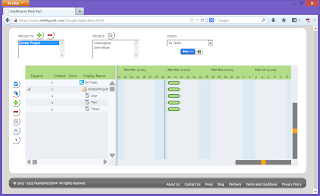
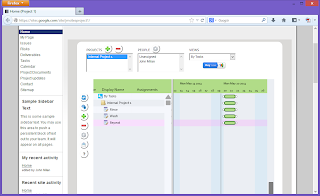
Here is IntelliGantt for Google, but notice that there are no visible projects. If you harken back to the start of this post you will remember we did have a project named 'Global Project'. Howeever, in this case IntelliGantt is aware it is within a Google Site and has therefore restricted the list of projects to only those created within this site. Because both the site and the IntelliGantt for Google instance is new, we do not see any projects. So let's add one of course.

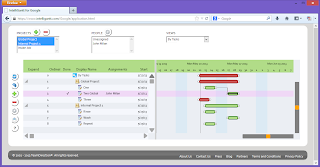
We have created 'Internal Project' which is now visible to everyone who as access to this Google Site. You can use Google Sites features to share the page with people you pick. However, when you go back to IntelliGantt for Google outside the Google Site, then you will see all the projects.

Here you can use our advanced features like swimlanes to compare resource allocation across multiple projects in various Google Sites.

Thursday, May 16, 2013

IntelliGantt for Google+

We've been touting our connectivity to Basecamp and Facebook in the last few blog posts, but this time it is Google and their 'Plus' social software in the spotlight. IntelliGantt for Google now uses Google Plus to both authenticate and connect with people in your circles. It's a little different than Facebook in that Google Plus uses loose connections (meaning I can add anyone to a social circle) whereas Facebook requires a strong connection (ie. both parties agree to connect). The end result is the same, however-- creating a resource pool is a snap. Let's see how it works.

We start with the ubiquitous login page. IntelliGantt will use Google Plus's single sign on technology so that this page may just be a flash if you are already logged in.

IntelliGantt requests information about your user profile and if it can create activities for you. You, of course, have the ability to grant or deny this request.

Once past the authentication you are in the familiar IntelliGantt interface which let's you create projects and tasks.

Here is where a bit of fun begins. Remember that Google Plus uses loose connections for filling circles of people. IntelliGantt will request all the folks that are visible from your circles, even the loosely connected ones. This means you will be able to assign just about anyone to your tasks. For example, let's add Guy Kawasaki (I happen to follow him) to our resource pool.
Since Guy is a people person, it only makes sense to assign him to the 'People' task.

You'll notice there is a 'Notify?' checkbox in this control. We're still working on how best to notify Google Plus users when they've been assigned a task. Stay tuned.

Finally, the project with its lone assignment. I hope Guy knows he has a due date coming up.

So which connection method is better, Facebook's or Google's? Like so many things the answer is 'it depends'. Facebook's tighter integration means two users are more likely to interact. However, Google's looser rules means you really can add anyone to your projects. The bottom line is you'll be able to use folks from these two rich systems to create a resource pool for your work.