Wednesday, January 12, 2011

Viewing SharePoint Data Lists in a Gantt Chart

It's great when tools can work with well-structured data in well-defined lists like Tasks, Events and Discussions. But what about the other 99% of the data out there? You know, the stuff that started in Excel and was then uploaded to a SharePoint Custom List. It would have been nice to clean the data up and put it into a task list, but that's more work than people should be required to do.

Rather, in a perfect world, a tool should be able to work with the hodge-podge of data that reflects our daily routine and aid in making sense of it.

We couldn't agree more.

Therefore, we designed the IntelliGantt Web Part to work not only with SharePoint Task and Project Lists, but with just about any list, including the least structured of all-- Custom Lists. This gives you the ability to work with the unruly but critical data already in use today and adds a dash of structure to help you organize a collaborative effort so you can finish tomorrow.

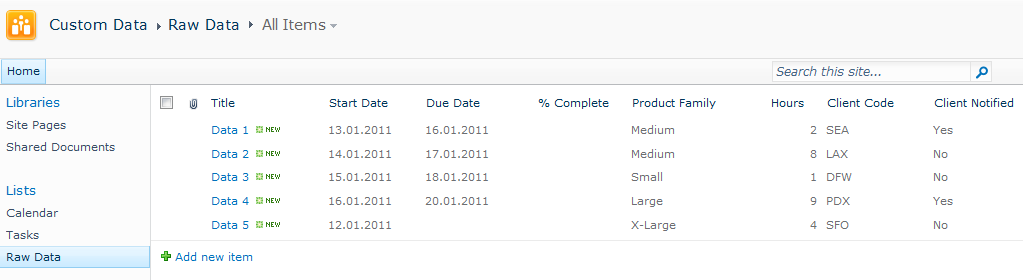
Take, for instance, this basic Custom List called 'Raw Data'. It probably came from a spreadsheet somewhere long forgotten.


That 'Client Notified' field indicates there's probaly some work behind updating these rows of data. It'd be great if we could lay it out in a real task oriented tool like the IntelliGantt Web Part.


Ideally, we would like to place the 'Raw Data' right into the task list as an additional project to view:


Happily, you can do just that!

First, we need to inform the IntelliGantt Web Part of the new list type we want to use. Every SharePoint list has a template id. In the Web Page Editor, the IntelliGantt Web Part has a text field you can add one or more template ids into.


The template id for a Custom List is "100", which makes me think it might have been the first list the SharePoint team ever created. We will add "100" to the field.


Click 'OK' to save your changes and when the IntelliGantt Web Part refreshes, lo and behold!


First, IntelliGantt Web Part found the 'Raw Data' because it matched the template id. Then it adapted to the data and view on that list and updated the column headers of the task list to match.

But we're not done yet. It's time to add our dash of structure to the mix. What we will do is add a few more fields and start whipping this data into shape.

First, let's go back to the 'Raw Data' list and open the List Settings.


Scroll down to the 'Columns' section in the List Settings. Here is where we can either add new columns or use columns already defined by SharePoint.


Why reinvent the wheel, right? Therefore let's go to the 'Add from existing site columns' and see what we find.


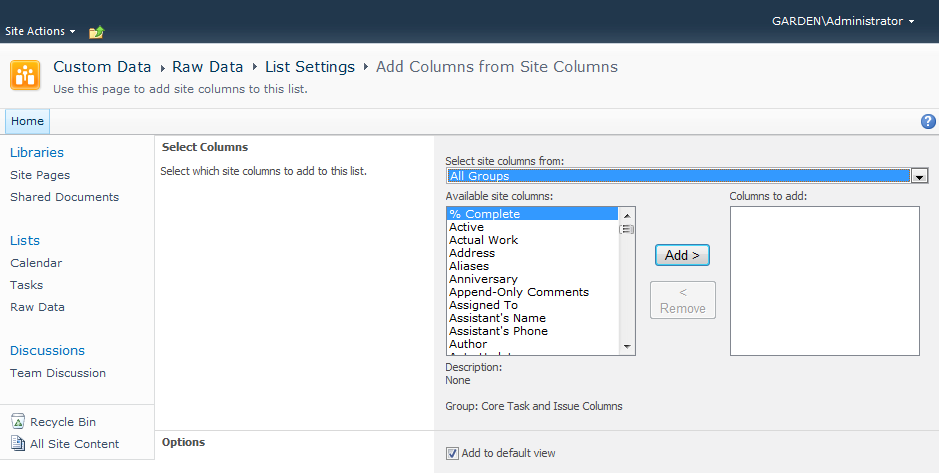
Looks like '% Complete' is at the top of the list. We can use that. And we will look for 'Start Date' and 'Due Date' as well.


Click 'OK' to add them and, upon return to the List Settings page, you should see these columns are now available in the 'Raw Data' Custom List.


While they where automatically added to the default view, let's change the order of the columns so we see the Start Date, Due Date and % Complete columns first.


OK, that wasn't too bad. Let's see what our IntelliGantt Web Part looks like now.


Excellent! Since this is a 'task aware' tool, we can quickly add a bit more structure to really help organize our data. For example, we can flesh out the Start and Due dates.


There, we've quickly applied a little bit of project management discipline to a formerly unstructured mess. Better yet, we did not have to examine and update each row of data in order to shoehorn it into an inflexible system. Instead, we brought a flexible (IntelliGantt!) system to the data and solved the problem.

By the way, everything is being stored in SharePoint and the simple updates we did to the Start and Due dates were saved in the 'Raw Data' Custom List.


If you have an unruly SharePoint dataset needing a bit of order, give the IntelliGantt Web Part a try today.

Tuesday, January 11, 2011

Trimming a Full Hierarchy with a Collapse Level

Because one of our design goals is being able to show you the whole picture, the IntelliGantt Web Part by default will show you all the tasks in any SharePoint Task List. All the summary tasks and their subtasks will be added to the current view in a beautifully full project hierarchy. Want to see all the subtasks of a folder 5 levels deep? No problem.

But what if you just want to see the first level of folders in order to get a quick sense of how long things in general are taking? And to get a quick view of the current progress and status? If you have multiple, fleshed out projects in the view together, collapsing the higher level summary tasks can be a useful way to see the 'bigger picture' before diving into all the details.

Since more than a few customers have requested this fature, we're happy to introduce the Collapse Level. Basically, you tell IntelliGantt how many levels to show in the hierarchy before summary tasks are 'collapsed' (i.e., do not show their sub tasks).

For example, here is a very simple project that contains a couple summary tasks with sub tasks.


Note that Food Group 1 and Food Group 2 are 'expanded'. You can change this be setting the Collapse Level via the web part editor page:


We will put in the number '3' which will expand things down to the first level of summary tasks. If you want to see more subtasks before collapsing summary tasks, use a larger number. If you don't even want to see the top-level summary tasks, use a smaller number.


When you click 'OK' and the IntelliGantt Web Part is refreshed, now the first level of folders will still appear but they not expanded.


The subtasks are still there of course. Just click on the expand/collapse indicator to the left of the folder to start burrowing.

Quickly Adding and Removing SharePoint Tasks

Raise your hand if you like filling out SharePoint Task List forms (or any form, for that matter).

While SharePoint item forms are powerful and flexible, they also require one click to bring up the form dialog, at least one typed character for every required field and a second click to save the form item. Additionally, if you wish to add an item to a folder, you need to click on the folder to establish a new view and then do the pre-requisites above. If you are working with an actual project hierarchy, filling an outline of all the levels quickly becomes burdensome.

Or you can use your mouse and our IntelliGantt Web Part. Because the web part shows you the complete hierarchy, there are no context switches. Simply move the mouse over the row you want to add tasks or summary tasks to and click the '+' sign. If you want to remove a task or summary task, click the '-' sign.

Here's how it works in pictures.

Below is an empty SharePoint Task List presented in the IntelliGantt Web Part.


If you have sufficient privileges (ie. you are an Administrator or the 'Edit Schedule' setting is enabled), when you move the mouse over the left side of the task list a special column will appear. It's similar to the 'Add Attachment' column that appears when you drag and drop files. Only this time instead of the upload arrow, you see a '+' sign and/or a '-' sign, depending on what row your mouse is over.


Here we only have the option to add because the mouse is over the actual Task List row. You can click on the '+' sign to add a task:


Or you can hold down the SHIFT key and click to add a folder:


When you move the mouse over a summary task, you have the option to add subtasks or remove the folder. You can add multiple tasks quickly by clicking multiple times:


Finally, you can remove tasks or summary tasks by clicking on the '-' sign.


Again, you can click multiple times to remove multiple tasks (or you could remove the summary task, which in turn removes all its subtasks). Once your mouse is no longer over an item that can be added to or removed, the 'no can do' symbol appears:


We believe this makes it much easier to quickly add and remove tasks and summary tasks to your SharePoint Task List as efficiently as possible, which helps you be more productive.