Showing posts with label Google Sites. Show all posts

Tuesday, November 19, 2013

IntelliGantt + IntelliTask + Google Sites = Revision 2

We received feedback from Google Site users that the IntelliGantt + IntelliTask combination wasn't as easy as it needed to be. So we took these findings to heart and made the interaction among our products and Google Sites even better. The cool thing is we were able to do this without changing the actual IntelliTask Gadget itself, just the underlying HTML the Gadget points to. This means if you've already installed the IntelliTask Gadget, you just need to refresh your web page to see the enhancements in your Google Site. Here's what it will look like:

The big changes here are twofold. First, we do the initial housekeeping for you: we now create your initial IntelliGantt Workspace and Project for you. This makes it easy when you visit IntelliGantt for Google to plan and schedule your project. Second, we put in a breadcrumb showing you the current workspace (which is the Google Site) and the current projects within the Google Site. You can see this if you click on the tab controls for 'Workspaces' and 'Projects'. These tabs help you identify the workspace and project we created. This makes it easy to find and then modify projects for this Google Site within our IntelliGantt for Google application. Though this example is simple, you will see the Google Site as a workspace when you start IntelliGantt for Google:

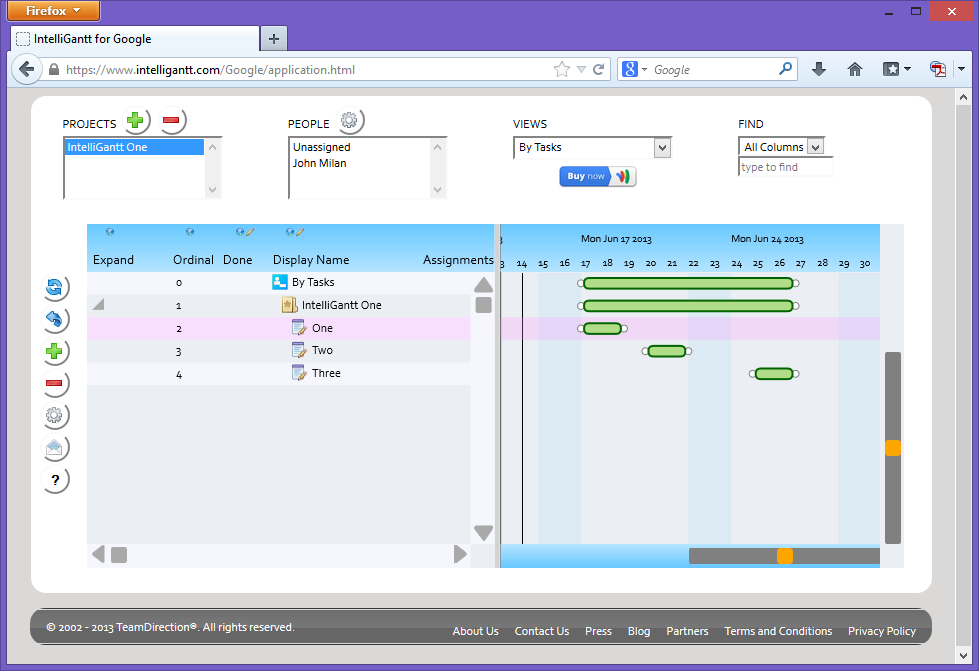
Click on the 'forward' arrow to go to the application where you can click on the Google Site's projects. Again, this is a simple example so you are just showing the single project created for you automatically, but you can have as many projects within a Google Site as you like.

Since this project was created by default when we went to the Google Site, it doesn't have any tasks in it. Here we will add a few tasks and assign one to 'John'.

Remember that the IntelliTask control is designed to show all the tasks assigned to the current user. That is, the active Google+ user. Since that happens to be 'John' here, when we go back to the Google Site and refresh the page, we see all of his tasks.

This makes it very easy to create a Google Site, drop in an IntelliTask Gadget, create an actual project with IntelliGantt and have everyone see their assignments in IntelliTask within the context of their Google Site.

Tuesday, July 09, 2013

Google Site Template for IntelliTask and IntelliGantt

We just published a Google Site template to the Google Site public template list that you can use to quickly get started with our IntelliTask for Google and IntelliGantt for Google solutions. We put IntelliTask for Google on the site's home page and IntelliGantt for Google on a separate page we called 'Project Manager'. The idea behind this is team members can go the the home page of a Google Site and view what their tasks are with respect to that site. Project Managers can also go to the site and use the IntelliTask for Google, or they can go the the special 'Project Manager' page where IntelliGantt for Google is available to create tasks, update schedules, make assignments and do all the things necessary for a healthy project. Also, because we put IntelliGantt for Google on its own page, you can 'lock it down' if you prefer so that only project managers can view (and therefore work with) it.

Here's how it works. First we will go to our Google Sites page so that we may create a new Google Site.

Next we will browse in the gallery for more templates.

Since it's not the most recent entry into the template list, we will need to search for it. We placed the template in the 'Business Collaboration' category. After this is selected, type 'IntelliTask' into the search box and click the magnifying glass. The 'IntelliGantt Starter Template' should appear.

Finish creating the Google Site as you normally would. One finish, on the Home page you will see an instance of our IntelliTask for Google. This is a Google Site aware and Google+ User aware task list designed to show whomever is viewing the page all their assigned tasks within the context of this Google Site. Of course, it looks a little empty right now, but we will change that shortly.

The template also has another page for our IntelliGantt for Google application. Here we will be able to create tasks, assignments, schedules, and even define what the column names are and if they are visible or editable for everyone.

Let's do just that. First we will add three tasks.

And then assign one we called 'Two' to Julia Windsor.

When we navigate back to the Home page, you'll see the IntelliTask for Google application, only this time, because it is Julia who is logged it, we see all of Julia's assigned tasks.

If Julia puts on her 'Team Member' hat, she may wish to report she is down with 'Two'. She mouse-clicks or touches the 'Done' cell to mark her task completed. This field is editable by default, but you can change which fields are visible and/or editable in the IntelliGantt for Google app. Speaking of which, if we navigate to the 'Project Manager' page we will see Julia's update in the context of the entire project.

Note that IntelliGantt for Google shows you which columns are visible in IntelliTask for Google by displaying a small 'world' image in the header column cell. Similarly, if the header column cell has a little pencil as well, then IntelliTask users can update assigned tasks for these fields.

You can change these settings by moving the mouse into the column header or selecting the column header by touching it, then clicking on the configuration cog image.

This gives you the ability to change the visibility or editability for a data column.

You can also change the display name for a data column by clicking or touch on its current display name. This brings up the editor for you to change as you wish.

Friday, June 14, 2013

Getting Started with IntelliGantt for Google

After authenticating with Google and granting the IntelliGantt for Google application permissions, the first time you see the application page it will be mostly empty with a dialog asking if you want to begin your evaluation.

All you have to do is click 'OK' in order to begin the fully functional 15 day evaluation. When you have 10 or less days remaining, every time you reload the page you will see this 'nag' box again with a message encouraging you to purchase a license, however during the evaluation period you can simply continue to click 'OK'. Once this dialog is closed you have an application with two users (Unassigned and yourself) and no projects.

Create your first project by clicking the '+' next to PROJECTS. This will bring up a dialog with a text box where you type in the project name.

The new project is listed in the PROJECTS listbox and is selected so that you see it in the task view as well. Let's add a few tasks to the project. Select the 'IntelliGantt One' row and then click the '+' button on the left side of the task list. This will bring up a multi-function add pane. This lets you add one or more tasks with precision: up, down or as a sub task. Click on 'Child Below' three times.

Each task created starts today and has a two day duration. To edit a task's display name left-mouse click or touch the Display Name cell. An in place editor appears letting you type in the new name. This will work for any field you wish to update, simply left-click or touch within the cell to start editing.

Once you have edited all the task names, you may want to change the schedule by adjusting start and finish dates. To do this move your mouse over the task in the Gantt chart or touch the task with your finger. With the mouse option you will see feedback as the mouse moves over the task by the outline turning gray. No such luck with the touch model, you just have to get your finger on it.

Now that you have selected the task (left mouse button down or touch) you can drag left or right to reposition the task on the timeline. Lifting the mouse button or your finger will complete the drag operation. Remember you can undo changes by clicking the Undo button to the left of the task list.

Once you have a general timeline you can create dependencies between tasks. The quick way is to select a task row, hold down the SHIFT key and select another task. That newly selected task will be the Successor to the previously selected task. This lets you make many dependencies very quickly.

Or, if you have lots of tasks scattered vertically, it may be easier to bring up the task dependency editor. Simply click withing the 'Precedessors' or 'Successors' cell of the task you wish to create a dependency for. Select the target task in the list box, click the green check button and you're done.

Making task assignments follows a similar pattern in that you click in the 'Assignments' cell and then select the people you wish to assign to a task. The only difference is initially, though the 'Assignments' column appears empty, the task is actually assigned to 'Unassigned'. The reason for this is to let you quickly identify all unassigned tasks in your project by clicking on the 'Unassigned' person in the PEOPLE list box at the top of IntelliGantt for Google.

Renaming Columns for Projects and Tasks

You can change the names of column headers with IntelliGantt for Google by clicking or touching the display name of column. The changes you make will be part of the current project you have selected within the task list. In this way you can begin to craft the look, feel and nomenclature of your projects for team members. If no project is selected, or the very top row is selected (named 'By Tasks'), then you will change the master template from which all new projects are created. Here's how it works.

Here we have selected the 'IntelliGantt One' project that we've used in other examples. This means column changes I make will only be a part of the 'IntelliGantt One' project.

With IntelliGantt for Google all column header names are editable. Simply left-click with the mouse or touch with your finger on the column header name you wish to edit. The textbox appears ready for your changes.

Type in whatever you like for the new title. The changes won't take effect until you hit the enter key. You can always edit the column name again, or hit undo.

After the enter key your changes are not only visible in IntelliGantt for Google...

... but in the shared IntelliTask for Google as well. For example, the 'IntelliGantt One' we created earlier from our Google Site. Your changes will be visible to all your team members using the same Google Site and task list.

Tuesday, June 11, 2013

Adding Tasks to Google Sites via IntelliGantt

In our previous post we saw how simple it is to add a task list to a Google Site. Though not immediately obvious, the benefits are the task list is scoped within a Google Site for both membership access and task assignments. Let's pick up where we left off and illustrate the powerful way our IntelliGantt for Google helps you manage the IntelliTask for Google task list placed within Google Sites.

We created our IntelliTask for Google list in our IntelliGantt One Google Site. We then moved to the IntelliGantt for Google application that a project manager would use to manage all the tasks and schedules across our Google Sites. We then added three tasks so that we have this:

Even though the project manager has added three tasks, none of them will show up in our IntelliTask for Google within the Google site. Why? Because IntelliTask for Google only shows tasks assigned to the current Google user, as determined by their Google+ signin. Thus we will need to assign a task or two to a user.

Now when we go back and refresh the IntelliTask for Google tool, we will see task 'Two' because that's the user we are logged in as.

The task assignee can quickly see what they have to do within the context of the 'IntelliGantt One' Google Site. Once finished, they can mark it as done by simply clicking in the 'Done' cell.

Back in IntelliGantt for Google, the project manager will see this change in the context of the entire project.

Hopefully we have illustrated the separation between the niceties of a task list tailored for an individual and the complexities of project management for a PM. Also important to note is that the IntelliTask for Google tool works with, and was designed for, mobile devices as well so that folks could see their tasks out in the world and report back status from anywhere with a single click-- or touch in this case. Just to reiterate that point, here is the same IntelliTask for Google list on an Android phone:

Or even within a persons GMail page:

But this isn't the only 'cross-application' data sharing that takes place between IntelliGantt for Google and IntelliTask for Google. You may have noticed the columns displayed in IntelliGantt were different that the columns displayed in IntelliTask. As in, 'where did the Assignments and Start columns go? Let's take a look at our first picture again, and this time check out the icons just above the column display names.

They're kind of small, but do you see the 'World' and 'Pencil' images? If a column has the 'World' picture above its name, that means it is visible within the IntelliTask for Google list. If a column has the world and the pencil above the column name, then it is visible and editable within the IntelliGantt for Google list. Because Assignments and Start do not have the world picture above them, they are not visible (or editable) within the IntelliTask for Google tool.

We can change this, of course. Simply move your mouse into the column cell, or touch the column with your finger. You will then see the configuration cog.

Click on this cog to bring up the simple options window for this column. Here you can choose to display the column and make it editable if you wish by checking the corresponding checkboxes.

Let's make this column visible in IntelliTask for Google for the user.

When we refresh IntelliTask for Google, we will now see the Start column.

However, because we did not add the 'Pencil' image, the IntelliTask for Google user will not be able to edit the value within this column. He or she can only view it.