
After authenticating with Google and granting the IntelliGantt for Google application permissions, the first time you see the application page it will be mostly empty with a dialog asking if you want to begin your evaluation.

All you have to do is click 'OK' in order to begin the fully functional 15 day evaluation. When you have 10 or less days remaining, every time you reload the page you will see this 'nag' box again with a message encouraging you to purchase a license, however during the evaluation period you can simply continue to click 'OK'. Once this dialog is closed you have an application with two users (Unassigned and yourself) and no projects.

Create your first project by clicking the '+' next to PROJECTS. This will bring up a dialog with a text box where you type in the project name.


The new project is listed in the PROJECTS listbox and is selected so that you see it in the task view as well. Let's add a few tasks to the project. Select the 'IntelliGantt One' row and then click the '+' button on the left side of the task list. This will bring up a multi-function add pane. This lets you add one or more tasks with precision: up, down or as a sub task. Click on 'Child Below' three times.


Each task created starts today and has a two day duration. To edit a task's display name left-mouse click or touch the Display Name cell. An in place editor appears letting you type in the new name. This will work for any field you wish to update, simply left-click or touch within the cell to start editing.


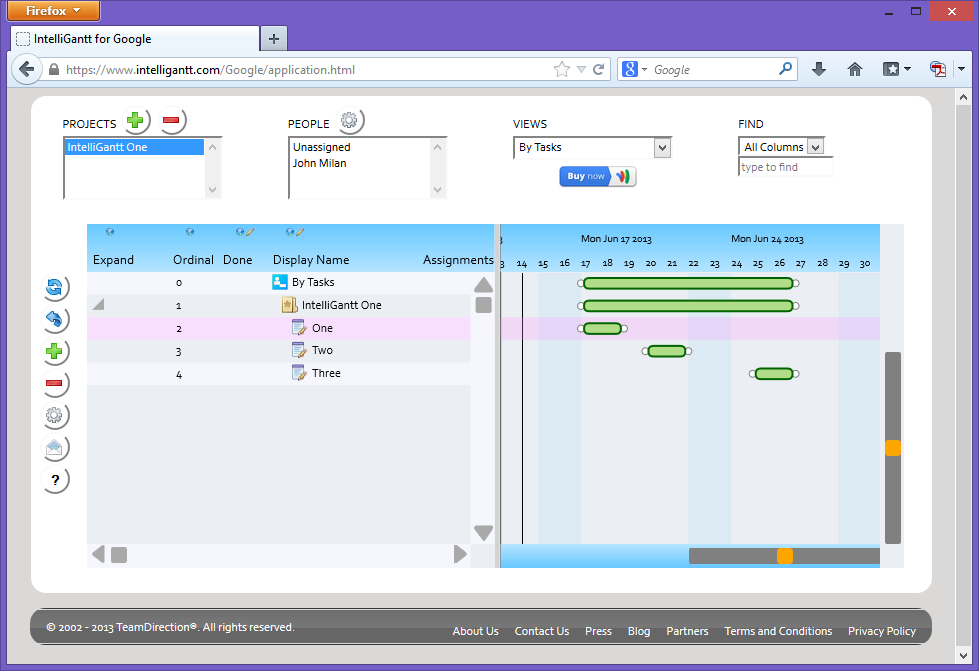
Once you have edited all the task names, you may want to change the schedule by adjusting start and finish dates. To do this move your mouse over the task in the Gantt chart or touch the task with your finger. With the mouse option you will see feedback as the mouse moves over the task by the outline turning gray. No such luck with the touch model, you just have to get your finger on it.

Now that you have selected the task (left mouse button down or touch) you can drag left or right to reposition the task on the timeline. Lifting the mouse button or your finger will complete the drag operation. Remember you can undo changes by clicking the Undo button to the left of the task list.


Once you have a general timeline you can create dependencies between tasks. The quick way is to select a task row, hold down the SHIFT key and select another task. That newly selected task will be the Successor to the previously selected task. This lets you make many dependencies very quickly.

Or, if you have lots of tasks scattered vertically, it may be easier to bring up the task dependency editor. Simply click withing the 'Precedessors' or 'Successors' cell of the task you wish to create a dependency for. Select the target task in the list box, click the green check button and you're done.


Making task assignments follows a similar pattern in that you click in the 'Assignments' cell and then select the people you wish to assign to a task. The only difference is initially, though the 'Assignments' column appears empty, the task is actually assigned to 'Unassigned'. The reason for this is to let you quickly identify all unassigned tasks in your project by clicking on the 'Unassigned' person in the PEOPLE list box at the top of IntelliGantt for Google.


No comments:
Post a Comment